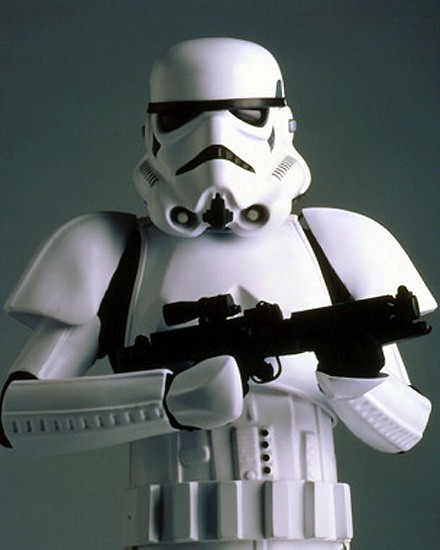
Not the hardest character to draw....but not the most fun either. I found that a two dimensional drawing was actually more helpful to me. This is the one I referenced during design:
To learn about my inspiration, please visit this post.
This was the pattern designed for the storm trooper You begin at the bottom right of the grid and finish at the top. Now if you look too closely you'll realize my math was a bit off. The entire picture and name is off center by about eight stitches. I fixed this in the digital version of the pattern but as a result, you'll start by chaining 68, kind of a weird number, but it looks fine nonetheless.
I also used a silver metallic ribbon to add stars. If you download the pattern you'll realize the stars aren't on it. They weren't on my original pattern, and I didn't plan them very specifically. Basically I just threw the yarn in for one stitch here and there to dot the background. I also used white yarn and added backstitching in areas where the black and dark blue seemed to blend into one color. It really helped sharpen the lines.
The backing on this pillow is a fleece I found at Hobby Lobby. I was hoping for some officially licensed Star Wars material, but couldn't find any. I also forgot to take a photo of the back. This picture is actually one I took in the store with my phone. I needed a second opinion from mom. :) The fleece on the right is what I ultimately used because it's soft and and doesn't fray, however I also considered the cotton fabric on the left. To get the perfect size, I pinned the finished front to the fabric and cut around it. It doesn't fray, but just in case, I used pinking shears to prevent any possible fraying. If using a fabric that does, simply use your favorite method of finishing to finish the edge. Using a yarn needle and embroidery thread or tatting yarn, complete a blanket stitch around the perimeter. You'll want to insert the needle about a quarter inch from the edge (or just under your hem, if you created one) and make each stitch about a quarter inch apart.
Using the blanket stitched edge, join the front and back together, wrong sides together using a single crochet stitch. Leave a small section open along the edge and remember to stuff it before you finish closing. My favorite part about this, is probably the fact that you don't have to weave in a million ends, just stuff them in the pillow. :)
I'd also like to share some important "Do's" and "Don'ts" I learned using the afghan stitch:
DO: Customize this pattern, or create your own, I promise you can do it!
DO: Watch the Gege Crochet tutorials on YouTube, especially the one on color changes.
DO: Take lots of pictures of the process, I really wish I had taken more, specifically for this pillow.
DO: Stay organized when arranging the skeins, the order you use them is best.
DON'T: Try to travel with this. This is really not the project you work on in the car or at the doctor's office. Sometimes you'll have so many skeins attached at once you'll have more of a headache untying the knots than it's worth.
DON'T: Over embellish. Step away from the work OFTEN and eliminate the inclusion of truly unnecessary details that would clutter and take away from the design rather than add to it.
DON'T: Be afraid to ask your family member for their opinion. (Unless they've also never seen Star Wars, in which case you turn to your sister's boyfriend)
DON'T: Design the pattern in one sitting. Step away from it often to get an overall perspective and clear your head after a while. This is more important than you realize. Believe it or not, this pattern, which I already admitted was the most difficult, was the ONE pattern I didn't step away from...and I realized half way through that the entire pattern was off-center. :/
I really hope you enjoy this pattern and it inspires you to make your own! :)
~That Farm Girl Teacher


No comments:
Post a Comment