Wednesday, December 31, 2014

Storm Trooper Pillow

As I discussed previously, this is one of the Christmas gifts I made for my a family member. You can see this post for more information. I have two more pillows to make, but it's going to be a couple of weeks before it's ready to share. The response I've gotten to these pillows is overwhelming and I sincerely thank each and every one of you. I've loved making all of these so much, and I really hope you all enjoy it as well.

It was originally made for my cousin, Ethan. He loves Star Wars and while there are half-a-million star wars characters, he loves to draw Storm Troopers specifically. I chose a dark blue background with hopes it would look like the night sky. This pattern is available for free at my Ravelry and Craftsy stores. If you came here through those sites, welcome! Hopefully I can give a bit more insight here. Now I'm not going to lie, and please don't shun me, but I've never actually seen Star Wars. This was the hardest pillow for me to design, mostly because I didn't really know what it was. :D For a reference, this is a storm trooper...
Not the hardest character to draw....but not the most fun either. I found that a two dimensional drawing was actually more helpful to me. This is the one I referenced during design:

There are so many ways to customize this pattern! You can change the name of course (I included an alphabet in the pattern as well as a number chart) the yarn, the backing, etc. I love the look of the textured yarn!

To learn about my inspiration, please visit this post.

This was the pattern designed for the storm trooper You begin at the bottom right of the grid and finish at the top. Now if you look too closely you'll realize my math was a bit off. The entire picture and name is off center by about eight stitches. I fixed this in the digital version of the pattern but as a result, you'll start by chaining 68, kind of a weird number, but it looks fine nonetheless.


I didn't add quite as many embellishments with this one as they weren't really necessary. The lines around the mouth (do they have mouths?) are REALLY important. It looks silly before you add those. It's simple to add with a tapestry needle, yarn and back stitching, but so important to the overall look.
I also used a silver metallic ribbon to add stars. If you download the pattern you'll realize the stars aren't on it. They weren't on my original pattern, and I didn't plan them very specifically. Basically I just threw the yarn in for one stitch here and there to dot the background. I also used white yarn and added backstitching in areas where the black and dark blue seemed to blend into one color. It really helped sharpen the lines.

The backing on this pillow is a fleece I found at Hobby Lobby. I was hoping for some officially licensed Star Wars material, but couldn't find any. I also forgot to take a photo of the back. This picture is actually one I took in the store with my phone. I needed a second opinion from mom. :) The fleece on the right is what I ultimately used because it's soft and and doesn't fray, however I also considered the cotton fabric on the left. To get the perfect size, I pinned the finished front to the fabric and cut around it. It doesn't fray, but just in case, I used pinking shears to prevent any possible fraying. If using a fabric that does, simply use your favorite method of finishing to finish the edge. Using a yarn needle and embroidery thread or tatting yarn, complete a blanket stitch around the perimeter. You'll want to insert the needle about a quarter inch from the edge (or just under your hem, if you created one) and make each stitch about a quarter inch apart.

Using the blanket stitched edge, join the front and back together, wrong sides together using a single crochet stitch. Leave a small section open along the edge and remember to stuff it before you finish closing. My favorite part about this, is probably the fact that you don't have to weave in a million ends, just stuff them in the pillow. :)
 
I'd also like to share some important "Do's" and "Don'ts" I learned using the afghan stitch:
DO: Customize this pattern, or create your own, I promise you can do it!
DO: Watch the Gege Crochet tutorials on YouTube, especially the one on color changes.
DO: Take lots of pictures of the process, I really wish I had taken more, specifically for this pillow.
DO: Stay organized when arranging the skeins, the order you use them is best.
DON'T: Try to travel with this. This is really not the project you work on in the car or at the doctor's office. Sometimes you'll have so many skeins attached at once you'll have more of a headache untying the knots than it's worth.
DON'T: Over embellish. Step away from the work OFTEN and eliminate the inclusion of truly unnecessary details that would clutter and take away from the design rather than add to it. 
DON'T: Be afraid to ask your family member for their opinion. (Unless they've also never seen Star Wars, in which case you turn to your sister's boyfriend)
DON'T: Design the pattern in one sitting. Step away from it often to get an overall perspective and clear your head after a while. This is more important than you realize. Believe it or not, this pattern, which I already admitted was the most difficult, was the ONE pattern I didn't step away from...and I realized half way through that the entire pattern was off-center.  :/

I really hope you enjoy this pattern and it inspires you to make your own! :)

~That Farm Girl Teacher

Monday, December 29, 2014

Horse Pillow

As I discussed previously, this is one of the Christmas gifts I made for my a family member. You can see this post for more information.


She is in sixth grade and loves her horse, Drawdy. This customized pillow has both her name and her horses name and image on the front. Additional details include a small key ring added to the halter, fringe for the mane and forelock, textured yarn details in the ears and heart, and a faux leather backing. This pattern is available for free at my Ravelry and Craftsy stores. If you came here through those sites, welcome! Hopefully I can give a bit more insight here.
My model
There are so many ways to customize this pattern! You can change the name (I included an alphabet and number chart in the pattern),  the name, alter the colors, pick a unique backing, etc. Please email me at thatfarmgirlteacher@gmail.com if you need assistance, or if you'd like to order a finished pillow from me.


To learn about my inspiration, please visit this post.

This was the pattern designed for the horse pillow. You begin at the bottom right of the grid and finish at the top. To me the neck is kind of skinny looking, but after the fringe is added it looks much better! :) Also, I wouldn't advise skipping the halter. I actually added it in order to create a distinction between the horses head and neck, without the halter, something is just...off.


I didn't add quite as many embellishments with this one as they weren't really necessary. The heart is made from a really pretty textured yarn I've had forever, and the inside of the ears is made from a yarn I spun myself from Alpaca fiber to add texture and shadowing. Originally this was going to be pink, but in hindsight I decided it made the horse look like a very bizarre mouse...

The backing on this pillow is a faux leather I've had lying in my stash forever. Because it's faux, it's soft and supple and can easily be punctured with a yarn needle.  To get the perfect size, I pinned the finished front to the fabric and cut around it. It doesn't fray, but just in case, I used pinking shears to prevent any possible fraying. If using a fabric that does, simply use your favorite method of finishing to finish the edge. Using a yarn needle and embroidery thread or tatting yarn, complete a blanket stitch around the perimeter. You'll want to insert the needle about a quarter inch from the edge (or just under your hem, if you created one) and make each stitch about a quarter inch apart.

Using the blanket stitched edge, join the front and back together, wrong sides together using a single crochet stitch. Leave a small section open along the edge and remember to stuff it before you finish closing. My favorite part about this, is probably the fact that you don't have to weave in a million ends, just stuff them in the pillow. :)
 
I'd also like to share some important "Do's" and "Don'ts" I learned using the afghan stitch:
DO: Customize this pattern, or create your own, I promise you can do it!
DO: Watch the Gege Crochet tutorials on YouTube, especially the one on color changes.
DO: Take lots of pictures of the process, I really wish I had taken more. 
DO: Stay organized when arranging the skeins, the order you use them is best.
DON'T: Try to travel with this. This is really not the project you work on in the car or at the doctor's office. Sometimes you'll have so many skeins attached at once you'll have more of a headache untying the knots than it's worth.
DON'T: Over embellish. Step away from the work OFTEN and eliminate the inclusion of truly unnecessary details that would clutter and take away from the design rather than add to it. 
DON'T: Be afraid to ask your family member for their opinion. My sister the horse-lover was especially helpful on this one. She was really helpful for advice on getting the correct proportions when designing the pattern, and determining which of the embellishments were unnecessary.
DON'T: Design the pattern in one sitting. Step away from it often to get an overall perspective and clear your head after a while. This is more important than you realize. Had I not stepped away from this pattern...I'd have made a bizarre looking mouse. :)

I really hope you enjoy this pattern and it inspires you to make your own! :)

~That Farm Girl Teacher

Bucket Truck Pillow

As I discussed previously, this is one of the Christmas gifts I made for my a family member. You can see this post for more information. This would also make a wonderful new baby gift, retirement gift, new hire gift, etc.

He is 7 or 8 and loves everything about his dad's job as a lineman. This customized pillow has his name on the front, his dad's bucket truck, and the back is made from one of his dad's work shirts! I actually think he had a hard time deciding which of the sides he liked better! This pattern is available for free at my Ravelry and Craftsy stores. If you came here through those sites, welcome! Hopefully I can give a bit more insight here.

They were the inspiration behind last year's present, too! :)
There are so many ways to customize this pattern! You can change the name (I included an alphabet in the pattern), or if you're making this for an adult as a retirement gift, take the name off entirely and change it to the hire year, or a nickname. (Number chart is also included) Make the logo specific to another company, or take it off entirely, alter the colors, pick a unique backing, etc. Please email me at thatfarmgirlteacher@gmail.com if you need assistance, or if you'd like to order a finished pillow from me.

I'll start with my inspiration. As I mentioned before, Gege Crochet made a really awesome Mario afghan that served as my initial muse. It began when I had an interest in why exactly one would want to learn to do the Afghan Stitch or Tunisian Crochet. Everything I'd seen so far seemed dull as it was always worked in one color and seemed easy to do the same thing with knitting or crochet. I stumbled on her YouTube videos accidentally and fell in love with the technique and the unique pattern she was creating. If this is your first time doing the Afghan stitch, or if you've never attempted doing all these crazy color changes I SERIOUSLY recommend her YouTube tutorials. It was how I learned and I found I needed little to no outside assistance as I was learning. Even if you're pretty well-versed, at least watch her video on making color changes. Doing it 'wrong' can create holes in your project, and tie your yarn into a knot the size of your head.

I dove right in, actually starting with a laptop case I started for my sister. (And still haven't finished, I know, I know, don't judge.) She wasn't really using a pattern for say, but was using pixelated pictures. The Mario game lends itself well to that as it is very 'blocky' but I was trying to create a horse, and didn't even know where to begin. Other patterns weren't specific to my task, and didn't look like my sister's horse. Finally, I pulled out some grid paper, taped four sheets together, and started making my own pattern.

The 'pattern' for Lawton's pillow.
I found that the best way to do this was to basically draw the design I wanted in pencil as if there wasn't grid paper, and then go back and match the blocks to the penciled in drawings. For example, I drew the circle of the wheel, then matched squares to my original line, keeping it symmetrical. This is really useful for curved lines because before doing this, everything with a curve basically looked...stupid. I also ran a quick crayon over it, sometimes in the actual color I wanted, more often in whatever was handy to get a better idea of the overall affect. When stitching, you'll begin in the bottom right hand corner and work up.

Gege didn't add much to the fabric after she'd stitched it, mostly because it wasn't really necessary for her design, but as soon as I finished this one I knew I had to add to it. I grabbed my yarn needle and yarn and used back stitching to add doors in the bed of the truck, a truck number, a step under the drivers door, outlining around his name, lines for the fender, the 'w' in the logo, lines along the top of the bed to add shadowing, etc. I also used cross stitches to make the head lights and tail lights (I forgot them originally) and half cross stitches to make the slope of the boom a little more gentle and not so 'stair-steppy.' I also slip sitched over the diagonals in the logo to make them pop more. I wish I'd taken photos pre and post embellishments so I can show you how remarkable the change was, but I really think this was a design where the embellishments made a huge difference in the overall look.

I had a little fun with the yarns used as well. The hubcaps aren't actually yarn, but quarter-inch silver metallic ribbon. The yarn used in the name is a beautiful hand-spun, variegated yarn I bought at a LYS in Asheville, NC that I'd been saving for the 'perfect' project. The stripes weren't originally planned. I planned on using the yellow at the bottom for the entire pillow, I knew I'd run out and bought more, but alas, when I arrived home I found it was just a shade off, the result of coming from a different dye lot. I was NOT starting over, so the stripes were a solution to this speed bump. I actually wound up liking the stripes better than I would have liked a solid yellow background.

Originally I was going to use a denim backing, but I thought a more personal touch would be to use the actual shirt used by the company. My dad also works there, but I really wanted the shirt to be specific to Lawton so through a lot of help from his mom, a friend, and my sister, they were able to get the shirt to me just in time! If you'd also like to use a shirt, I wouldn't suggest going smaller than a men's size medium. You could certainly use a smaller shirt, but know you'll probably need to do some patching in order to make it large enough. To get the perfect size, I pinned the finished front to the shirt and cut around it. You could probably use pinking shears to prevent fraying but I wanted to be double-sure this would last for many years, so I completed a double-fold machine hem, first. You could also serge the edge, or complete any hem you prefer. Using a yarn needle and embroidery thread or tatting yarn, complete a blanket stitch around the perimeter. You'll want to insert the needle about a quarter inch from the edge (or just under your hem, if you created one) and make each stitch about a quarter inch apart.

Using the blanket stitched edge, join the front and back together, wrong sides together using a single crochet stitch. If you are using a  button-up shirt like mine, you can stuff through the button, otherwise leave a small section open along the edge and remember to stuff it before you finish closing. My favorite part about this, is probably the fact that you don't have to weave in a million ends, just stuff them in the pillow. :)

To make up for stealing his shirt I also made dad a coozie. :) There's not a pattern for this, I pulled a coozie out of our kitchen drawer and stitched the sleeve around it.
 
I'd also like to share some important "Do's" and "Don'ts" I learned using the afghan stitch:
DO: Customize this pattern, or create your own, I promise you can do it!
DO: Watch the Gege Crochet tutorials on YouTube, especially the one on color changes.
DO: Take lots of pictures of the process, I really wish I had taken more. 
DO: Stay organized when arranging the skeins, the order you use them is best.
DON'T: Try to travel with this. This is really not the project you work on in the car or at the doctor's office. Sometimes you'll have so many skeins attached at once you'll have more of a headache untying the knots than it's worth.
DON'T: Over embellish. Step away from the work OFTEN and eliminate the inclusion of truly unnecessary details that would clutter and take away from the design rather than add to it. (For example, I chose not to include a line for the driver's door as it would clutter the area around the logo.
DON'T: Be afraid to ask your family member for their opinion. My dad was especially helpful on this one. He works for the company and was really helpful for advice on getting the correct proportions when designing the pattern, and determining which of the embellishments were unnecessary. (I tried this wacky single crochet thing on the boom and he let me know it looked like a hot mess. Trust me--he was right!)
DON'T: Design the pattern in one sitting. Step away from it often to get an overall perspective and clear your head after a while. This is more important than you realize. Had I not stepped away from this pattern and done some dishes, I would have made a truck with very tiny wheels. It's amazing the things you'll miss if you spend too long staring at the same thing without taking a break.

I really hope you enjoy this pattern and it inspires you to make your own! :)

~That Farm Girl Teacher

Saturday, December 27, 2014

Merry Christmas

I know, I haven't made good on my promises, but I will be making up for it soon, I ..er.. promise :D Between wedding planning, work, and school, I haven't had a ton of free time, and most of what I do have goes towards actually crafting...instead of blogging about crafting. Hopefully I will work my schedule out better, but for now, let me show you what I've been working on.
From left to right. Horses: Tux, Jose, Drew Piney. Dogs: Mandy Cole. Standing people: My dad, Randy, and sister, Miranda. Sitting people: Me, my mom, Tammy. For the story of our annual family Christmas photo, click here.

By the way, I know it's past Christmas, but Santa brought the Wooten household the flu for Christmas and we're just running behind in general. :)

Every year for Christmas I give the children in my family handmade gifts. (To see last year's, click here.) This year, I decided to use some new skills I learned with the afghan crochet stitch (sometimes called Tunisian crochet) to make personalized pillows for each of them. I was really inspired by an amazing Mario afghan crocheted by the INCREDIBLE Gege over at GegeCrochet. (Link: here, seriously, go check it out, it's amazing!!!) She also has wonderful tutorials on her YouTube profile I recommend if you are new to this technique, I used her videos myself when I was learning. All of these patterns were created by me, I'll talk a little bit about the process I use to create them here, and again when I 'officially' share these patterns. I'm still working on how to transfer them from paper into a digital format, and will be putting them on Craftsy and Ravelry as soon as I'm finished.

This was the first one I made for my cousin, Tiffany. The original horse design actually came from a different pattern I made for a laptop case for my sister. The coloring is designed to actually look like her horse, Drawdy, and the pillow features a fringed forelock/mane, a metal ring for the halter, textured yarn in the heart, and hand spun yarn (by me) inside the horse's ears. The backing of the pillow is a cool faux leather fabric I've had laying around waiting on the perfect project.


The next pillow was designed for my cousin, Lawton. His father works as a lineman for the local electric company. He is all boy and loves everything about his dad's job. This bucket truck was designed with this in mind, featuring his dad's actual truck number and company logo. The pattern also has silver ribbon in the hubcaps, and variegated, hand spun yarn (Not by me, I purchased it about a year ago in North Carolina) for his name. The backing for this pillow is cut from one of his dad's old work shirts to add an even more personal touch. (I actually think he like this side more! haha)

To make up for cutting his shirt, I also made his dad this coozie from the sleeve. :) There's nothing special about it, basically I just dug a coozie we already had out of the drawer and sewed it into the sleeve.

Finally, this was for my cousin, Ethan. He has really been into Star Wars lately and his mom told me he draws Storm Troopers every time you turn around. This was actually the most challenging for me, mostly because I didn't have the slightest idea what a Storm Trooper actually looked like. After several Google Image searches, I arrived at this pattern and I think it's pretty close. The additional back stitching around the mouth (do they have mouths?) is what really bring it together. The pillow also has silver ribbon stitches to imitate stars and textured yarn for his name and the border. The backing of this one is a fleece fabric with realistic-looking images of the Solar System. I forgot to take a photo of the back before wrapping it though. :(

I still have two more pillows and a laptop case I'm working on that use similar techniques. When I share each of the patterns I'll talk a little more about what went into each of them. These shots are of the patterns I used to make them. As you can see, I taped grid paper together to design them and used crayons to color things in and get a better overall idea of how each would look. You may also notice that some things changed between the first design and the final product.

Saturday, August 2, 2014

Stay Tuned

I will be posting several posts in the near future, unfortunately the neighbor's cow ate our phone/internet line and it's taken us a while to get it fixed. (I know, A COW!) lol I will be finishing up the formal wear series and share a few back-to-school patterns and tutorials with all of you very soon. :)

Saturday, July 5, 2014

Formal Wear: Adjusting the Fit

I'm so excited about this formal wear series, inspired by my experience sewing my sister's prom dress! Check it out, here, if you haven't seen it yet. Please let me know if you have any special requests. :)

Ah, you're in the final stages, you just successfully inserted a zipper you never want to lay hands on again, and despite all your careful measuring and practice runs....it doesn't fit quite right. Well, looks like you're going to have to start over! KIDDING! You can fix it, don't panic!

Now, it's easier to fix something that's too large than too small, but I will do my best to help.

Too Small:
1. Restitch all the seams in the area that is too small as close to the edge of the seam allowance as you can get, then rip out the original seam. This can give you up to an inch and a half depending on how big your seam allowance was.  
2. Rip out the side seams and add in additional fabric. This isn't the most attractive option, but you may be able to use contrasting fabric to make it look like a cool color blocking. You can also do this on a back or front seam and add a faux placket to hide the extra fabric added. 
3. Allow it to "ride down with wear" (bonus points: name that quote!) On one of my favorite comedic TV shows, the employees of this department store used this phrase, or variations of it, to convince customers to buy their sub-par merchandise. In one of my favorite episodes, one of the characters pushes his knee into an armhole that is too tight to pop a few stitch and make it more comfortable for the customer. The result on TV wasn't as effective, but it's actually not a bad idea. I've done it on a few of my own things that are just a tad too tight. Be cautious though, and don't pop too many stitches! 

Too Large: 
1. Take it in. The easiest way to do this is to put on the garment inside out, pin where you want a tighter seam, take it off and sew. Easy! I would suggest doing both sides as equally as possible to avoid lopsided-ness. 
2. Increase the size of darts or tucks...or add in new darts/tucks altogehter. 
3. Belt it. This is kind of the cheater way, but a good temporary fix if you don't anticipate staying the size you are, of ir you don't have time to sew. 

Too Droopy:
I have this problem in the neckline all the time! I usually just tighten the straps/sleeves (place on inside out, pin, sew) or add a few extra darts in the top of the neckline on the back of the garment. Sometimes it's not really droopy, just low cut, so I add an extra button or only wear it with a cami.

Too Long:
Trim it when you hem it. If you're hemming by yourself, use a similar garment you already like the length of to hem the new one. When people ask me to hem pants for them, I ask them to also give me a pair they like. Hold it up, measure, and we're good to go. If you're really in a hurry, go for a casual rolled look, or use iron on hem tape. (Which my mom swears by!)

Too Short:
Again, it's harder to add than take away but I'll try and help. 
1. Add an extra panel on the bottom. You can add a contrast color to make it look intentional or another panel of the same fabric. A trim, such as lace, is also a good option.
2. If you don't already have one, add a waist. Take the dress apart in the area where the bodice and skirt connect and add an additional panel. Again, contrast the colors or match it, your choice. 
3. Rethink the final look. Maybe consider wearing shorter heels, shorten it from a maxi length to a cocktail length, or add tights/leggings. For sleeves consider going from long sleeve to three quarter, three quarter, to cap, cap to strap, etc. If it's pants go from long to cropped, cropped to capri, capri to Bermuda, or Bermuda to shorty. Sometimes you can also lop off a bunch of fabric and just wear it as a top instead of a dress, or wear it as a bathing suit cover up where it's more socially acceptable for it to be too short. 
4. Use my awesome alteration tips to pass it down to someone smaller.    :D

What other tips do you have? Let us know what works, it's never fun to be stuck in a situation like this! 
~Farm Girl Teacher 

Thursday, July 3, 2014

Formal Wear: The Zipper (eek!) My Special Technique!

I'm so excited about this formal wear series, inspired by my experience sewing my sister's prom dress! Check it out, here, if you haven't seen it yet. Please let me know if you have any special requests. :)

So, you've gotten almost all of the main portions of the dress done, and now you're on to the last few steps....I've gotten so many emails about this topic, hopefully I can shed some light...

Please note: I have always used invisible zippers and rarely branch out from this. I know not everyone is fan of this style of zipper, but I have never had one split, even under serious strain, and I don't find them more difficult to insert. This method will work on a traditional zipper and will hide it similar to the way an invisible one his hidden. If you want the zipper to be exposed I would suggest inserting it the traditional way. Also, I did come up with this on my own, but someone else out there probably invented it first, I'm not claiming to be too special. :D
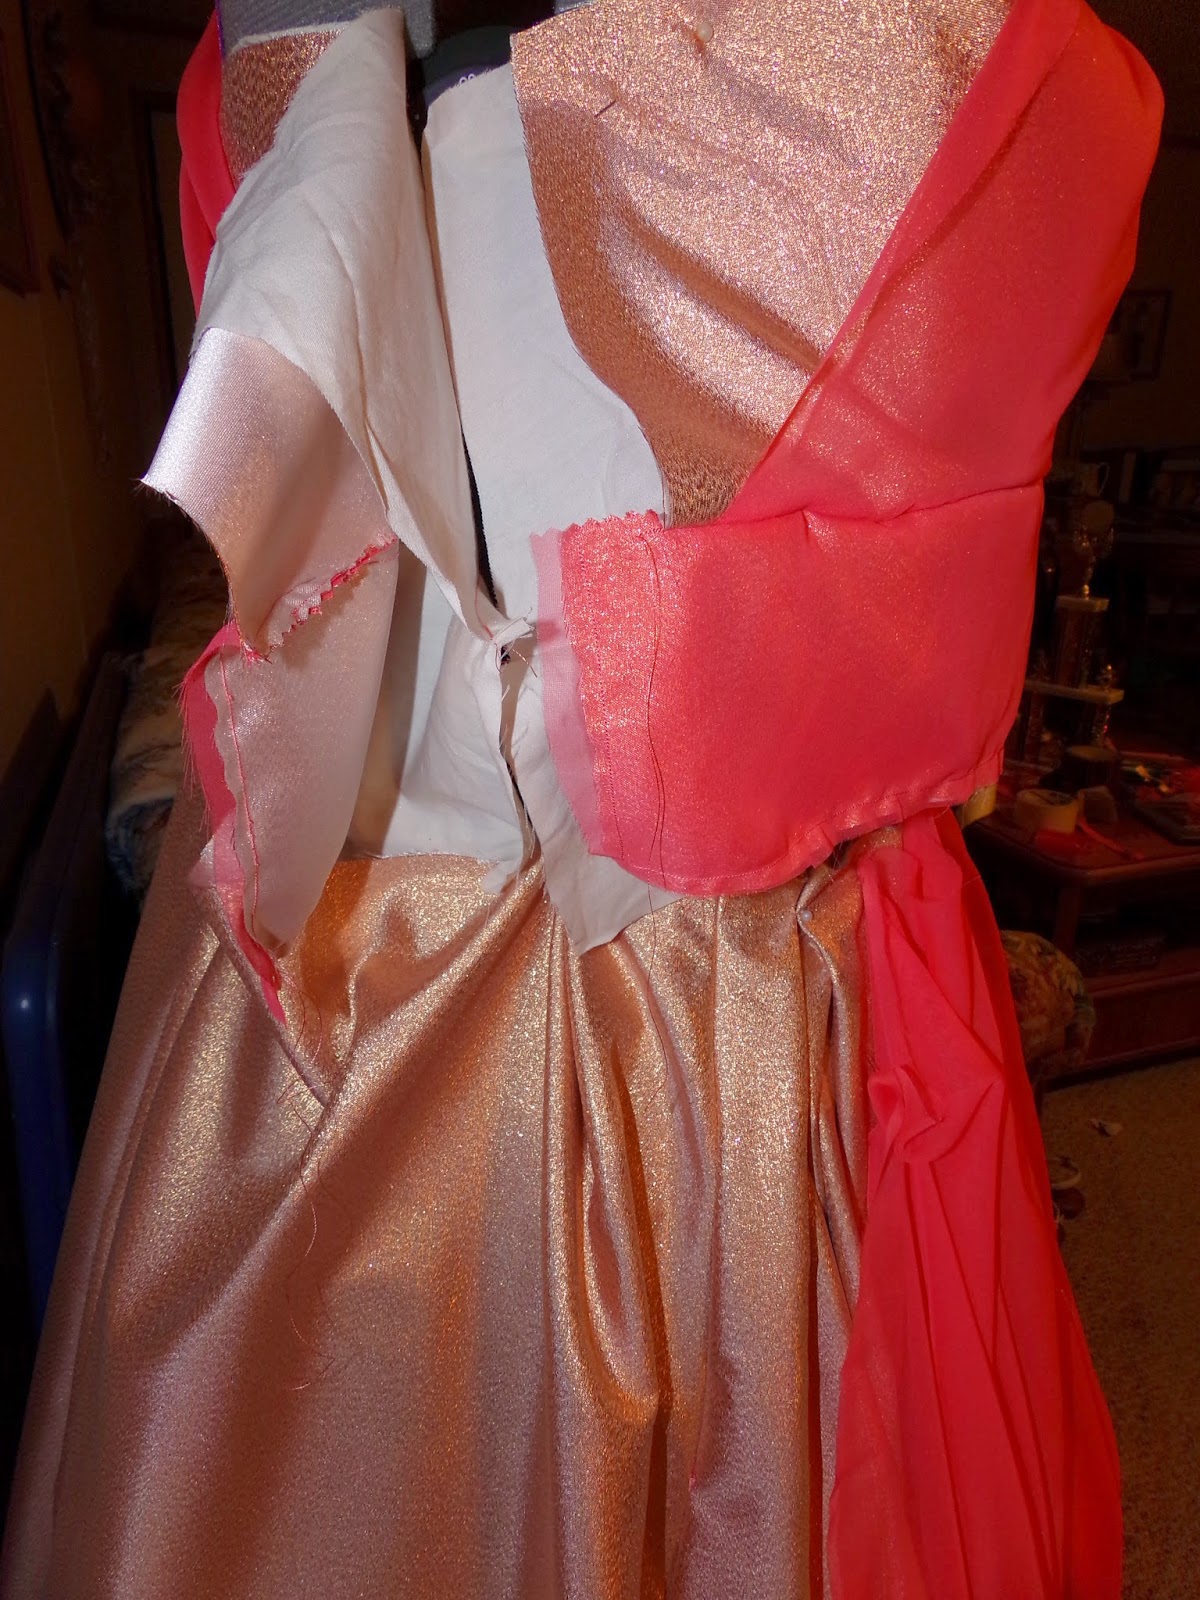
The only shot I have pre-zipper insertion. I actually wound up redoing the bodice after realizing there was about a 6 inch are that was too small. :( Luckily I caught it before inserting the zipper and version #2 looked better anyway.

What makes your technique special?
Let me tell you my story first. You guys know I love to talk, so I apologize in advance if I drag on a bit. ;) I love showing off my handmade clothes, but when I say to friends, "Thanks, I made this!" the first thing they do (especially fellow seamstresses!) is check the zipper. Sound funny? lol I do it to other people too. It's one of the more complicated pieces of a garment and speaks to your talents and attention to detail. It was also one of the things I struggled with constantly before developing the technique I'm going to share with you. Believe it or not, I hated inserting zippers. I would get almost all the way done with something and set it aside for weeks because I didn't want to ruin it attempting to put in a zipper. Usually it wound up in the hands of my mother or grandmother six months later, and while it looked great, I was also just a tad bit ashamed that I had chickened out, once again. I actually had NIGHTMARES about inserting zippers. Dramatic? Yes, so I eventually decided I was going to conquer my fears the summer of 2013! (I know, only a year ago! See, I'm not a zipper god, you can do it too!) I wanted to make new clothes to begin my first year of teaching since my wardrobe had dwindled to shorts/jeans paired with a t-shirt during my college years, but that also meant mastering the zipper. I sort of developed this technique as a 'gateway' if you will, into legit zipper insertion. My mother did NOT teach me this....and thought it was a little ridiculous since it is extra work...BUT it also allowed me to successfully insert zippers for the first time, ever! I have never had to totally rip out a zipper using this method! (I do often make minor adjustments, more on that later!) I did this technique for a long time, until slowly I stopped doing it as much. My confidence grew, and I slowly weaned myself off this method and did it the 'legit' way without fear! That being said, I do occasionally revert back if I'm using expensive fabric, inserting into many layers of fabric, or if my fear gets the better of me...all three of course applied to Miranda's prom dress. :)

Should I practice first? 
Is this your absolute first time inserting a hem? Probably. Done it before, but not well? Maybe. If you already made a toile (tutorial, here) it's not a bad idea to also buy a cheap zipper of the correct size to practice. You may also want to keep a cheap zipper on hand that you can rip out and practice inserting on different toiles, types of fabric, etc. I have a zipper I use specifically for this purpose. I bought it on sale only to realize it doesn't zip smoothly so I saved it and use it on rough drafts and practice. Most of the time, inserting a practice zipper allows me to better check the fit, and sometimes I use it to practice sewing a zipper to a specific type of fabric. (With thicker fabric, like denim or leather, it's important to check that your needle is strong enough to handle all of the layers)

If this is your first one I recommend practicing on a skirt. The zipper is usually shorter (7-9 inches) and you don't feel as though you've put as many hours of work into a skirt. I also recommend that you don't get too attached to the skirt....you know, just in case. :D

 When do I insert the zipper?
I get this question a lot! I don't read written patterns nearly as much a I probably should, either because I've dramatically altered the pattern, or because I can easily see how to construct the pieces without instructions. I'm pretty sure most patterns will say to insert the zipper, then the hem as the last two steps, without mentioning how to adjust fit. 
Here's what I do...I complete everything except the zipper/hem. I try the garment on the actual person (don't rely on the dress form!) to see that it mostly fits. I make minor adjustments as needed before inserting the zipper. Often, this means adjusting the straps/sleeves because the neckline is hanging too low. I also make sure that it's not too small, there's no point in doing a zipper if it's too small to begin with, it's much better to insert it knowing it's a bit too big than to insert it hoping that will somehow add a few inches. (and yes, I have done that, doesn't work!) After the zipper has been inserted, I go back and take it in where I need to. (I will explain how to adjust fit in the next post.) I always wait and do the hem last because making sure it fits well on top, and has a working zipper, allows you to better adjust the length of the hem, and means you're more likely to get a straight hem. 

Where do I insert the zipper?
The pattern should tell you, it's almost always in the back seam or in the side seam. Back is more common, but if the pattern doesn't have a back seam, or has a special back detail, it will go in the side. (Both of these applied to Miranda's.) The zipper will hide a bit better in the side seam and is easier to zip, but depending on the neckline/sleeve styles it can also be a tad more challenging to wriggle into. Generally speaking, I follow the pattern, unless I've made major changes and need to move the zipper. For skirts, I almost always put the zipper on the side. It rarely changes the appearance of the skirt and makes it easier to dress.

 Tutorial:   
Okay, I'll quit babbling now and get to the actual tutorial. For my seasoned veterans I will repeat, this is a bit more work than the 'traditional' way, however I feel that in the long run it saved me time when I was learning to insert zippers because the 'traditional' way also meant ripping it out three times. Also, the pictures I took of me doing this on the actual prom dress were lost when my SD card was damaged so I re-shot them on a dress I'm working on now. The bottom layer is a plain white cotton and it has a sheer and somewhat delicate, yet bulky, overlay. 

Materials:
- Matching zipper (skirts/pants are usually 7-9 inches, dresses are around 22)
- Garment
- Strong, matching thread. (I ditched the silky thread I used on everything else in lieu of a more sturdy thread for the zipper.)
- Any contrasting thread. 
- Zipper foot--this is really not optional, a regular presser foot will only give you a headache and an ugly zipper, if you don't already have one, invest! (It will be worth it, I promise!) If you're insistent on using the regular foot, adjust the needle position so it is either at the far left or far right, as needed, and proceed with caution...I warned you!
-Iron/ironing board
-Starch
-Seam Ripper, razor, small scissors, etc.

Steps:
1. If you haven't already, sew up the seam until you get to where the bottom of where the zipper will be, for  many patterns a dot will indicate where to stop.

2. Switch to the contrasting thread and machine sew a basting stitch the rest of the way, WHERE THE ZIPPER WILL GO. I know this is backwards, you will no longer have an opening in your garment, and this is okay for now. Hand basting will not work, set your machine's stitch length to the longest possible and use a contrast thread, you'll rip it out anyway! (Trust me, it will work out in the end!)
Left=Basting, Right=Regular
I know, my 'matching' white thread doesn't match all that well, but the blue thread broke like crazy, trust me, it does look okay on the final product. 

3.  Iron seams out, I seriously recommend starching as well. You want really sharp seams, especially in the area that will hold the zipper. It will look cleaner and be easier to rip out the basting.

4. With the garment inside out, pin the closed zipper face down over the basting area. The seam you created with the contrast thread will provide a sharp guide, you want the teeth of the zipper directly over this seam. The straighter you do this, the better. I also think it's easier to pin down only one side and pin as flat as possible.

 PLEASE NOTE: You will not be opening the zipper until the very end, in order to avoid weird stitching around the zipper pull, I start about an inch below that, when I'm completely finished, I will go back with the zipper open and fix that area.
Check and double check alignment now!
5. Switch back to the matching thread and a zipper foot. I did the right side of the zipper first (the side without pins) so the needle is set closest to the teeth of the zipper, and the foot is on the outside of this. You always want the needle closest to the teeth. Stitch down the pin-less side top to bottom, routinely checking that the teeth are in line with the seam. 

CAUTION: Because you don't have an opening of a decent size in the dress anymore, be extra cautious that you don't accidentally sew through another part of the dress as well, you don't want a sleeve to get caught up into the zipper! (But if you do, don't panic, rip out that section of stitching and redo it.)

6. Remove all the pins (your new seam will hold the zipper in place) and stitch top to bottom down that side of the zipper, needle closest to teeth.  When you get to the bottom go back and forth over the teeth a few times to secure. Go slow, this is where you're most likely to break a needle.
 
The left side is a little wonky, luckily this fabric hides it well.

7. Now the zipper is in, but you still don't have an opening so, using a razor, small scissors, or a seam ripper, rip out the contrasting basting stitch as you unzip and double check the zipper's functionality and appearance.

8. Make minor adjustments to the zipper itself as needed. I finish the area where the pull was, and occasionally I rip out an inch or two where the teeth weren't lined up well and touch up that area. I also double check that the seam that goes up to the bottom of the zipper looks good. Sometimes there's still basting stitches down there where the regular seam didn't go high enough and I restitch it to avoid seam splitting down the road. Add a button or hook/loop to the top and, voila!


Congrats! You just inserted a zipper and you still have all the hair on your head! :) If that doesn't deserve a pat on the back, I don't know what does! :D

Come back soon and I'll help you adjust the fit and throw in a hem! 
~Farm Girl Teacher

Monday, June 23, 2014

Breaking News!

I'm breaking again from the formal wear series because I have some news! :) Hang on to your socks! :D

I started this week off by celebrating my birthday! My mom loves this picture and wished me a "berry" Happy Birthday...
 Photo: Rebecca Wooten, wishing you a "berry" Happy Birthday!  I hope you know how much I love and appreciate you.  Life since you were born has certainly been full of tears, laughter and so many wonderful adventures.  I can't wait to see what all the next year brings you.  <3 <3 <3
And for my birthday surprise, I'm pleased to announce there is going to be a Mr. Farm Girl Teacher! :D My boyfriend of three years proposed to me recently and I am thrilled to know I'll be spending the remainder of my life with my other half. We met in middle school and have been friends for years, I truly feel that God made us for each other and I can't wait to spend my life with him!

“A lady's imagination is very rapid; it jumps from admiration to love, from love to matrimony in a moment.”
 
(Bonus points if you can name the book before you reach then end of this post!)
Y'all know me, so you probably know I've already planned our wedding on Pinterest (along with an imaginary house, children, sewing room, etc. haha!) but I will be sharing photos of planning and preparations after we set a date and get closer to time. (Don't get too crazy, there is not a date set, but I promise it will be a while from now....I need time to knit a dress! KIDDING!)

I also recently purchased a new car! My first car was a trusty 1993 Toyota I bought in high school, but alas, I have outgrown it and am proud to say I have upgraded to a 2015 Mazda 6 that I am LOVING. It has back doors AND cupholders, technology these days! If you know my family personally, you also know we have a small obsession with naming our vehicles so I've been putting lots and LOTS of thought into finding the perfect name for my Mazda. (This is serious business, people!)
 After much deliberation, I have officially named my car! I was rereading one of my favorites, Pride and Prejudice, when I test drove the car and on the day I picked it up, so I have been toying with character names from the book. In honor of finding my "Mr. Darcy" my car is "Mrs. Darcy." Although I don't care much for the 2005 movie, the "Mrs. Darcy" ending was it's saving grace.

“I am the happiest creature in the world. Perhaps other people have said so before, but not one with such justice. I am happier even than Jane; she only smiles, I laugh.”  
  
But, MOST IMPORTANTLY (and this really is the most important!) my family and I celebrated my little sister's high school graduation this weekend! So proud of her, she is the Jane to my Lizzy! (I am REALLY channeling Pride and Prejudice today!)
I am so proud of the person my sister has become. She is caring, funny, hardworking, and she's become a leader that knows how to make truly good decisions! She's accomplished quite a lot in the last 18 years and I know the journey is just beginning! Of course, by Mr. Darcy's standards, accomplished ladies are hard to come by.. ;)
As of right now, she plans to get her AA at a local community college, before going to a state college to begin their Animal Science program. (Y'all seriously have no idea how accurately this fits her personality!) 
My mom made an awesome slideshow presentation with pictures from our childhood set to music that fits (she sorted through 18 THOUSAND pictures, go mom!) and we really got to see how wonderfully well-rounded Miranda is. 
 
 She has accomplished so many things and (almost) always had a smile on her face doing it! I can't wait to see what the next chapter has in store for her!
 
I know she sounds perfect but trust me...she's not, you see, she has this REALLY annoying habit of being taller than me.... :)
WARNING: Lame joke alert:
We're so hot, we have to wear shades! (Don't hate, I warned you!)
 
I hope your summer has been as wonderful as mine has so far! Stay tuned! :) 
~Soon-to-be-Mrs. Farm Girl Teacher 

Monday, June 16, 2014

Formal Wear: Perfect Gathers

I'm so excited about this formal wear series, inspired by my experience sewing my sister's prom dress! Check it out, here, if you haven't seen it yet. Please let me know if you have any special requests. :)

I know, I took another hiatus. Unfortunately, when cleaning out my classroom on the last day of school, I broke the SD card all my pictures were saved on. :( Most of the really important ones were saved on my computer, but I lost a lot of the tutorial ones I took for this blog and had to redo them. Hopefully, I am back on track. I will be finishing up this series soon, and posting a new crochet pattern before too long! :) 

Without further ado, I present my favorite way to gather! I probably didn't invent this, but I use it constantly and share it with as many people as I can, I like it THAT much! :)

Why "gather?"
Gathers are often used to add volume in the form of ruffles to a skirt. The result is typically a bit more gentle than what would result from pleating. You may also see it on a dust ruffle for a bed, or in the 'poofy' sleeves of old-style dresses. (Anne of Green Gables, anyone?) Gathers may barely be noticeable (sometimes called ease stitching on more modern sleeves), or it may be more severe, like in a skirt.

What makes this method better?

 Another popular way to gather involves a loose machine basted stitch and then tugging on the bottom thread. While this method does work, I personally kind of hate it. I always break a thread and it doesn't work for the large gathers I typically use. I will use the basting method to do the ease stitching part of a sleeve, but that's about it. For Miranda's dress, I had to gather a HUGE amount of fabric into very tight gathers and this technique was a lifesaver! 

Materials:
 You'll need your fabric (obviously), any color crochet thread (I think this is size 10 and can be found near the yarn. Regular yarn may work too, but it's a bit too flimsy for me. Regular thread is too weak.), and finally your presser foot. I love to use this foot, which my machine calls a 'braiding foot.' If you have a piping foot, it would work as well. That being said, I used a regular, straight-stitch foot for a long time, and while it's just as effective, the braiding foot is awesome because I don't have to worry at all about accidentally stitching through the crochet thread.


The foot has a small hole in the front the crochet thread fits through and the bottom of the foot has a groove that allows the foot to sit flush against the fabric while still sewing over the thread. 


I seriously suggest investing in this if you know you'll be completing a project with a ton of gathering. For everyday, occasional stuff, you can survive with the regular foot, I did, forever. :)

Steps:
1. Get your machine prepared. If you plan on ripping out the sewing thread, choose a contrast color, if you don't mind leaving it in (I always do) choose a color that matches your fabric. The crochet thread will always be ripped out, so it doesn't matter too much what color you use. You'll be setting your machine on a zig zag stitch just wide enough to stitch over the crochet thread. Once your width is set, match the length. (My width is set to about 2.5, so I matched the length to about 2.5 as well.) If you're using a regular presser foot, you may want to set the width just a bit wider to make sure you don't accidentally stitch onto the thread.

2. Stitch, DO NOT stitch over the crochet thread. (This is easy with the braiding foot, be more careful if you're using a regular foot.)

3. Cut your thread and begin sliding the fabric up and down on the crochet thread. It reminds me of the way you'd move curtains up and down a curtain rod. 

4. Use a straight stitch to secure the gather the way you like, or go ahead and attach it to the rest of the project. When you're finished, you should be able to just pull the crochet thread out completely. Ripping out the zig zag stitch is optional, I almost never bother, it's not noticeable at all.

Note: For Miranda's dress, I attached the under and over skirt together by straight stitching it onto a piece of 2 inch ribbon the same length as the bodice.  The ribbon helped hold it steady and keep it at the correct length, I then attached the whole thing to the bodice. I pulled out the crochet thread, but left the ribbon. At that point, it was too hard to rip out. :)

Voila! Step back and admire those beautiful gathers! :)


~Farm Girl Teacher

P.S. I recently found a new blog I am seriously IN LOVE with. This blogger recreates mouth watering foods from her favorite books. If you love to read and love to eat, this blog is for you! (and if you don't love those things, I will be very disappointed in you!) Seriously, head over there and explore, you'll walk away inspired!

Like what you see?

I'm often asked if I will make custom projects or sell my work. The short answer is, yes.
My patterns are always free, but I do charge for projects mostly to cover the cost of resources, and my time. Basically, if you see something you like and want me to make it, I'd be happy to talk to you. The best way to contact me is through my email thatfarmgirlteacher@gmail.com. I can make nearly anything and I've had people in the past send me photos of what they're interested in. Time to make it, cost, and more can be discussed through my email and varies greatly based on what you'd like made.
I also sell my hand spun yarn at our local Farmer's Market. I don't really sell yarn online because my inventory varies greatly, however if you know you want something specific, I can usually work something out with you, again, just send me an email.